Meta Description: Discover the easy secrets to making the best Homemade Marshmallows. Our simple recipe guarantees fluffy, melt-in-your-mouth vanilla squares, perfect for hot cocoa or s’mores. Learn pro tips and fun flavor variations!
The Magic of Fluff: Why You Need to Make Homemade Marshmallows
I will never forget the first time I made homemade marshmallows. I was a skeptical baker, convinced that the store-bought bag of white, uniform squares was fine. Then a friend insisted I try hers. It was like biting into a vanilla-scented cloud—pillowy soft, melt-in-your-mouth, and exploding with real flavor. They were nothing like the slightly rubbery ones I grew up with.
That experience taught me a valuable lesson: some things are just infinitely better when you make them from scratch. Homemade Marshmallows are the perfect example. They are not just better; they are a completely different confection. This recipe takes something many consider ordinary and turns it into a luxurious, extraordinary treat.
Making them might seem intimidating, like a complex science experiment, but I promise, it’s a surprisingly simple process involving gelatin, sugar syrup, and a powerful whisk. It’s a wonderful, slightly sticky, and incredibly rewarding baking project that leaves your kitchen smelling amazing. Plus, once you master this basic recipe, a world of amazing marshmallow flavors opens up to you! Get ready to elevate your hot cocoa game forever. 😋
🌟 Why Bother? The Difference is in the Fluff
Before we dive into the sticky sweetness, let’s talk about the why. What makes these homemade versions so superior to the commercial ones?
- Superior Texture: Store-bought marshmallows are often dense and slightly stretchy. Homemade Marshmallows are famously fluffy, light, and pillowy soft. They literally melt on your tongue and have a bounce that’s simply unmatched.
- Pure, Customizable Flavor: Commercial brands often use artificial flavorings and corn syrup derivatives that leave a dull aftertaste. Our recipe uses pure vanilla extract for a clean, bright taste. You control the ingredients, which means you can infuse your creations with anything from peppermint to coffee!
- Better Melting: This is huge for hot cocoa lovers! When a homemade square hits hot liquid, it slowly deflates into a thick, creamy, flavorful layer of foam, far better than the stiff melting of their commercial cousins. This is because they contain more air and fewer stabilizers.
- Gut-Friendly Boost: Our recipe uses unflavored powdered gelatin, which is the component that provides the structure. Gelatin is a great source of protein and amino acids that some look for to support digestive health.
Making these is an introduction to the rewarding world of candy making, and it’s a project that delivers a spectacular result every time.
The Recipe: Classic Fluffy Vanilla Marshmallows
Making marshmallows involves two main steps: blooming the gelatin and heating the sugar syrup to the soft-ball stage. A stand mixer and a candy thermometer are highly recommended for the best results!
⏰ Prep Time & Cook Time Summary
| Category | Time |
| Prep Time | 20 minutes |
| Cook Time (Syrup) | 10 minutes |
| Setting/Curing Time | 4 hours (minimum) or overnight |
| Total Active Time | Approx. 30 minutes (plus rest) |
✅ Ingredients
For the Marshmallow
- 1 cup (240ml) cold water, divided
- 3 packets (about 2.5 Tbsp) unflavored powdered gelatin
- 2 cups (400g) granulated sugar
- 2/3 cup (225g) light corn syrup
- 1/4 teaspoon salt
- 2 teaspoons pure vanilla extract
For Coating/Dusting
- 1/2 cup (60g) confectioners’ sugar (powdered sugar)
- 1/2 cup (60g) cornstarch
🧑🍳 Step-by-Step Instructions
1. Preparation (The Crucial First Steps)
- Prep the Pan: Lightly grease a $9 \times 9$ inch square pan (use an $8 \times 8$ for thicker marshmallows) with a neutral oil or nonstick spray. Line the pan with parchment paper, leaving an overhang on two sides for easy removal. Grease the parchment paper again.
- Make the Dusting Mixture: In a small bowl, whisk together the confectioners’ sugar and cornstarch. This mixture is your anti-stick armor. Liberally dust the prepared pan with a third of this mixture, tapping out any excess. Set the rest aside.
- Bloom the Gelatin: Pour 1/2 cup of cold water into the bowl of a stand mixer fitted with the whisk attachment. Evenly sprinkle the unflavored powdered gelatin over the surface of the water. Do not stir. Let it sit and “bloom” for about 5–10 minutes. It will thicken and look spongy.
2. Cooking the Sugar Syrup
- Combine Syrup Ingredients: In a medium saucepan, combine the remaining 1/2 cup of water, granulated sugar, light corn syrup, and salt.
- Cook and Boil: Cook the mixture over medium heat, stirring just until the sugar dissolves. Once it begins to boil, stop stirring. Attach a candy thermometer to the side of the pan.
- Hit the Temperature: Continue to boil until the syrup reaches the soft-ball stage at $240^\circ F$ ($115^\circ C$). This should take about 6–8 minutes. This precise temperature is non-negotiable for a perfect set.
- Remove from Heat: Once the syrup hits $240^\circ F$, immediately remove the saucepan from the heat.
3. Whipping the Fluff
- Start the Mixer: Turn the stand mixer on low speed to gently mix the bloomed gelatin.
- Pour Slowly: While the mixer is running on low, slowly and carefully pour the hot sugar syrup down the side of the bowl into the gelatin mixture. Avoid pouring directly onto the whisk or the sides of the bowl.
- Whip to Perfection: Once all the syrup is added, gradually increase the mixer speed to high. Beat the mixture for about 10–12 minutes.
- Check for Readiness: The mixture will triple in volume, turn brilliant white, become incredibly fluffy and glossy, and hold soft but distinct peaks. The bowl of the mixer should feel cool to the touch. This means the gelatin has cooled and activated its setting power.
- Add Vanilla: During the last minute of whipping, pour in the pure vanilla extract.
4. Setting and Cutting
- Pour and Smooth: Working quickly (the marshmallow sets fast!), pour the mixture into the prepared pan. Use a greased spatula (grease your tools!) to spread the marshmallow evenly and quickly.
- Dust and Cure: Dust the surface generously with more of your reserved sugar/cornstarch mixture. Do not cover the pan with plastic wrap—this traps moisture and can lead to stickiness. Let the marshmallows cure (set) uncovered at cool room temperature for at least 4 hours, or ideally, overnight.
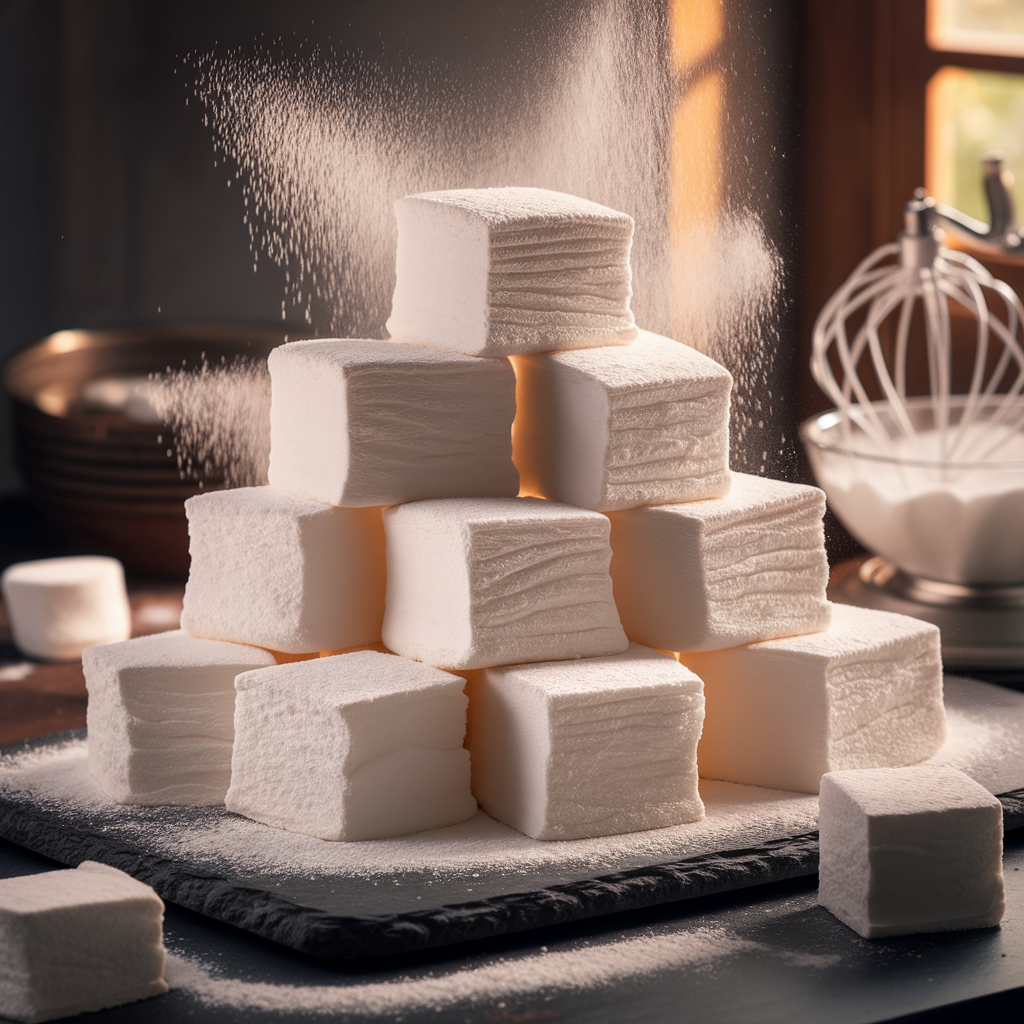
- Cut: Once completely set, turn the slab out onto a cutting board dusted with the remaining sugar/cornstarch mixture. Using an oiled knife or pizza cutter, cut the slab into desired shapes (usually $1$ inch squares).
- Coat: Roll or toss each cut marshmallow in the remaining dusting mixture, making sure all the cut sides are coated to prevent sticking. Shake off the excess powder using a fine-mesh sieve.
🌟 Pro Tips and Troubleshooting
Essential Equipment
- Candy Thermometer: You must use a reliable thermometer to hit exactly $240^\circ F$. Guessing the temperature leads to under-set (gooey mess) or over-set (chewy caramel-like) marshmallows.
- Stand Mixer: While a powerful hand mixer can work, a stand mixer is highly recommended because the syrup is hot and the beating time is long (10-12 minutes).
Troubleshooting Common Issues
| Problem | Probable Cause | Simple Fix |
| Gooey Blob | Sugar syrup was undercooked (below $240^\circ F$). | Reheat the syrup to the correct temperature next time. No fix for the current batch, though it’s great as a sticky dipping fluff! |
| Stiff & Chewy | Sugar syrup was overcooked (above $250^\circ F$). | Your marshmallows will be edible but dense. Ensure your thermometer is accurate and pull it off the heat immediately at $240^\circ F$. |
| Too Sticky | Not enough dusting mixture, or the marshmallow was set in a humid environment. | Toss them again in a fresh batch of the $50/50$ cornstarch and confectioners’ sugar mix. Store in a dry, cool place. |
☕ Creative Flavor Boosters and Pairings
This basic vanilla recipe is just the beginning. The world of marshmallow flavors is wide open! Add your flavor extracts during the last minute of whipping.
Fun Marshmallow Flavors (LSI Keywords)
- Peppermint Marshmallows: Substitute vanilla extract with 1 1/2 teaspoons of peppermint extract. Add a few drops of red food coloring during the last minute of whipping and use an oiled toothpick to create a festive swirl. Perfect for the holidays!
- Hot Chocolate Marshmallows: Dissolve 2 Tablespoons of unsweetened cocoa powder and a pinch of salt into the cold water before blooming the gelatin. Add a few drops of chocolate extract or a small amount of strong coffee at the end.
- Fruity Marshmallows (Long-tail Keywords): Use freeze-dried raspberry or strawberry powder! Add 3 Tablespoons of freeze-dried berry powder into the dusting mixture and another $1$ tablespoon into the marshmallow fluff during the last minute of beating.
- Cinnamon Swirl: After pouring the fluff into the pan, sprinkle the top lightly with ground cinnamon and use a knife to gently swirl it into the top layer before the marshmallow sets.
Serving Suggestions and Uses
- Hot Cocoa: The most important use! Drop a fluffy marshmallow into a steaming mug of hot chocolate for the ultimate creamy indulgence.
- Gourmet S’mores: Ditch the commercial versions. A homemade marshmallow toasts beautifully over a fire, creating a crispy outer shell and a completely molten interior. Pair with high-quality chocolate and graham crackers.
- Edible Gifts: Cut your marshmallows into cubes or use oiled cookie cutters to make festive shapes. Place them in a cellophane bag tied with a ribbon for a thoughtful, handmade gift.
- Topping Pies: A layer of slightly toasted, homemade marshmallow on top of a pumpkin pie, sweet potato pie, or lemon meringue pie is a show-stopping garnish.
🧊 Storage Tips and Shelf Life
- Airtight Container: Always store your homemade marshmallows in an airtight container at cool room temperature. Keep them away from heat and direct sunlight.
- Avoid the Fridge: Do not store them in the refrigerator, as the moisture can cause the sugar to weep and make the marshmallows wet and sticky.
- Shelf Life: Properly coated and stored, your marshmallows will stay fresh and fluffy for up to 2 weeks. After that, they may begin to slowly harden.
- Freezing for Longer Storage: For longer storage, you can freeze them! Place the individual, dusted marshmallows in a single layer in a freezer-safe bag, or double-bag them in an airtight container. They will last up to 3 months and do not truly freeze, but get very cold. Thaw them at room temperature for an hour before enjoying.
📊 Nutritional Information (Estimated Per Serving)
Please note: Nutritional values are estimates and can vary based on specific ingredients and cut size. This is based on a recipe yielding 36 (1-inch) squares.
| Nutrient | Amount |
| Calories | $85\text{ kcal}$ |
| Total Fat | $0\text{g}$ |
| Saturated Fat | $0\text{g}$ |
| Cholesterol | $0\text{mg}$ |
| Sodium | $15\text{mg}$ |
| Total Carbohydrate | $20\text{g}$ |
| Dietary Fiber | $0\text{g}$ |
| Total Sugars | $19\text{g}$ |
| Protein | $1.5\text{g}$ |
The Fluffiest Conclusion
You’ve made it! You now have all the tools and knowledge required to make a batch of truly extraordinary Homemade Marshmallows. The process is part chemistry, part patience, and all fun. From the moment the vanilla-scented fluff comes together in your mixer to the satisfying sound of the knife slicing through the set slab, this is a baking project that truly delights the senses.
Remember, the slight effort is a worthwhile investment. You’re trading a bland, rubbery square for a pillowy soft, fluffy confection that will instantly elevate your next cup of hot cocoa or s’mores session.
Don’t let the candy thermometer intimidate you—this is a project you can conquer! Grab your gelatin, clear your counter space, and get whipping. When you try that first fresh, homemade marshmallow, you’ll know exactly what I mean. Try the recipe today and share your favorite flavor combination! Happy whipping!