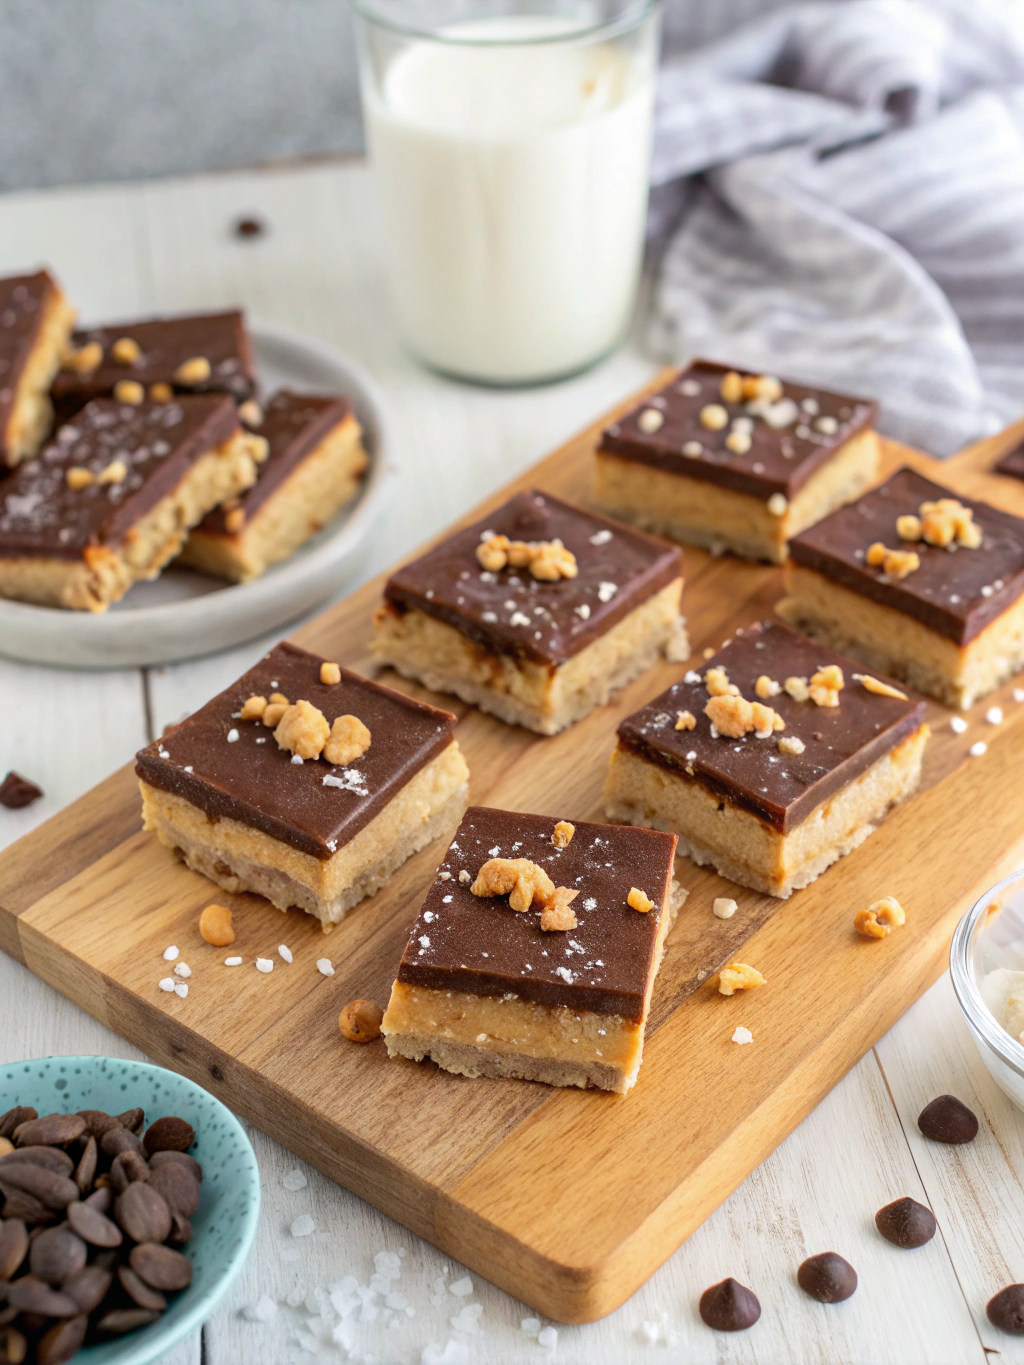
Why You Must Have These No-Bake Peanut Butter and Chocolate Bars
All right, let’s face it: there are moments when you really crave a peanut butter and chocolate treat—and you want it immediately. You’re craving it right now. Perhaps you’re wondering if it’s already Friday, or perhaps you completely forgot to bring dessert to a potluck, both of which are common occurrences. In any case, this recipe for 5-Minute No-Bake Chocolate Peanut Butter Bars has been a lifesaver for me.
I’m all for a dessert that doesn’t require baking, combines peanut butter and chocolate, and takes only five minutes to prepare.
To be honest, I’m unsure of anything else that will satiate you more thoroughly. Additionally, you should not feel restricted to writing only 500 or 800 words. Here is the complete 1,500-word journey. We can make it meaningful!
Quick and Easy Desserts That Don’t Require Baking
#### Why Are No-Bake Desserts So Great?
Listen up: in my kitchen, no-bake desserts reign supreme. There is absolutely no need for an oven, absolutely no danger of burning anything, and the cleanup is quite effortless.
What, realistically, could possibly go wrong? If you want your bars perfectly firm, you may need to give them five minutes in the fridge. All you need is five minutes. You have five minutes to surf through TikTok. 😜
#### The Best Time to Bake Peanut Butter and Chocolate Bars
When should you make these bars?
It’s already nine o’clock, and I’m craving something sugary. There is no vitality in me, yet I want to wow visitors.
* I’d like to make something decadent, but I’d rather not turn on the oven.
* For the record, I eat peanut butter every single day; it’s my obsession.
## What You Need for These Easy Desserts: Ingredients
Alright, then, let’s begin. Quite a few basic ingredients will suffice. Plus, what’s wonderful? You probably already have them in your pantry. In that case, I have a new VIP shopping list for your next trip to the grocery store.
Ingredients for the Main Course (Recipe)
The recipe calls for 1 cup of creamy peanut butter (or crunchy if you like a different texture), 1/2 cup of melted unsalted butter, 2 cups of powdered sugar, and **for texture and structure, use 1.5 cups of Graham cracker crumbs.
Half a cup of chocolate chips, preferably milk or dark chocolate, but feel free to experiment!
* ** For melting with the chocolate coating, 1/4 cup of peanut butter is required.
**## Supplemental Features and Alternatives**
Try using digestive biscuits instead of graham crackers, or even crumbled pretzels. If you prefer not to eat nuts, you can use sunflower seed butter or almond butter.
* Sea salt or vanilla extract, a pinch of each, will enhance the flavour.
* Flaky sea salt, chopped almonds, or little chocolate chips can be sprinkled on top.
This is a strong suggestion: What is the true challenge? Use plenty of peanut butter. Sad, dry bars don’t belong in life.
A Comprehensive Guide on Making No-Bake Chocolate Peanut Butter Bars in Just 5 Minutes
The real magic takes place here. There is nothing complicated about this; in fact, it involves dessert science, which is much more entertaining.
### H2: How to Get These Bars Ready (We Can Make Them Together!)
4. Prepare the Peanut Butter layer. #### H3: 1.
1. Make a smooth mixture by mixing the peanut butter and melted butter in a large bowl.
Place the graham cracker crumbs and powdered sugar in the second bowl. Mix, mix, mix! Because of its thickness, you may require your hands to access it. Put yourself in the shoes of a child creating a mud pie.
3. Firmly press the mixture into a lined 8×8-inch pan. Use a smaller pan if you prefer thicker bars. Trust me when I say that using parchment paper makes removal a breeze.
1. Prepare the Chocolate topping. #### H3: 2.
1. Combine the remaining peanut butter and chocolate chips in a bowl that can be microwaved for 30 seconds at a time, stirring every 30 seconds to prevent mush.
2. Once the peanut butter base is prepared, pour and spread the chocolate mixture on top. Smooth it out with a spatula.
**## Heading 3: Slice
First, put the pan in the fridge or freezer for 5–10 minutes, or until the chocolate hardens.
2. Slice into squares or bars. Expert tip: For clean cuts, put a sharp knife in hot water.
I think that’s all! Do not bake. No drama. There will be no sobbing over cookie burns—just pure peanut butter and chocolate happiness.
The Real Science Behind These Bars (also known as Dessert Science 101)
Why is it that peanut butter and chocolate go together like peanut butter and chocolate? I have, and I think it’s the perfect combination of salty and sweet, with the perfect amount of crunchiness.
The Top-Secret Recipe
* Graham craGraham crackers provide a mild crunch, a pinch of salt, and support for the other ingredients. * Peanut butter = rich, creamy, saltytter = rich, creamy, salty * Chocolate = sweet, slightly bitter, smooth
Once you combine them, each mouthful will be like a high-five for your taste buds. 😁
## The Most Common Errors and Their Solutions
We all detest sweet failures. Never worry about undercooked chocolate peanut butter bars again with these straightforward steps.
### Headline 3: Be Wary of These
**Use too much powdered sugar?** Don’t measure it out. Chalky bars form. Not enough? Set they will not.
If the chocolate is melting too rapidly, stir it. Stir it every 30 seconds. The aroma of burnt chocolate is a sombre one.
When working with reduced-fat peanut butter: Leave it out. Forget it. The bars will not harden, and you will be sorry you ate even one.
Question 3: How to Fix It
Please let tLet the bars chill for a longer period if they feel too soft. You could also place them in the freezer.lso put them in the freezer.
If the bars are too firm, wait a few minutes for them to cool to room temperature before cutting.
For a less crumbly consistency, increase the amount of melted butter or peanut butter used in the future.
** My Own Strategies, Tactics, and Hacks
These bars aThese recipes are perfect for any occasion; I’ve prepared them for office parties, breakups, road trips, and Netflix marathons. I won’tg if I say that I’ve surprised myself a little bit by trying something new.
For an extra “wow” factor, how about swirling some Nutella into the chocolate topping? To make these vegan, simply use plant-based butter, vegan chocolate chips, and natural peanut butter.
To make it gluten-free, you can replace the graham crackers with gluten-free cookies or oat flour.
For a perfect crunch, try adding chopped toasted peanuts or pretzel crumbs as a texture element.
Just so you know: FYI: Slice these bars into little squares and place them on a nicelovelyy to make them a real party trick. 😋 You’ll appear far more elegant and sophisticated than you actually are.
## Nutrients: The Best, Worst, and Peanut Butter Part
You won’t fiYou won’t find these in the “diet food” section, but trust me, they are better than most store-bought candies, including peanut butter.ter provides some protein and good fats, chocolate has antioxidants (yes, really), and the amount of sugar is up to you.
#### H3: If You Really Must, Make It Healthier
If you want If you wantavoid extra sugar, use natural peanut butter. Protein powder or a sugar substitute (such as Swerve or monk fruit) can replace half of the powdered sugar.
For a less sugary and more “grown-up” treat, try dark chocolate.
But savour your dessert, if you’re having dessert.
Ideas for Displaying Your Chocolate Peanut Butter Bars
Feel free to serve these any way you prefer:
Presented in adorable cupcake liners for easy portability or atop a charming dessert dish with a dash of sea salt.
***To top ice cream:** Indeed, that’s correct. Finely chop and top vanilla ice cream with a sprinkling.
They are also fantastic present options. They will become heroes the moment you wrap them in wax paper and bind them with string.
## Common Enquiries Regarding No-Bake Peanut Butter Chocolate Bars
*## Is crunchy peanut butter an option?
In a heartbeat! The bars get an extra crunch from the peanut butter. Please ensurPlease ensure that you enjoy the peanut chunks. Use cream if you must.if you must.
How many days are these bars good for?
They have a potential shelf life of one week when sealed in an airtight container and kept in the refrigerator. On the other hand, you can store them in the freezer for as long as two months.
Are they able to be made without dairy?
I think so! Make use of vegan butter and chocolate chips that are free of dairy. The difference will be unnoticed.
### My bars didn’t set correctly; why?
Maybe you usYoud low-fat peanut butter, too much butter, or too little sugar. For the next time, be sure to measure out the full-fat peanut butter.
Finally, whip up a batch of these bars in the kitchen!
We’re going To be candid, it is likely that you are already considering these no-bake chocolate peanut butter bars. There is no doubt about it! They are quick, simple, appealing to a crowd, and undeniably delicious—qualities that these delightful treats embody.out it! Fast, easy, crowd-pleasing, and absolutely delicious—those are the qualities that these little treats possess.
**Use the entire 1,500-word strategy here; don’t restrict yourself to 500 or 800 words.** Make this recipe your ownMake this recommendation your own by saving or sharing it, and then report back in the comments with your results or any wild modifications.last time I regretted adding marshmallows.)
Send me a direct message Send me a dire message about your chocolate emergency, subscribe to my updates, or follow for more no-bake dessert magic. Get dirty and savour your new favourite snack right now! 🍫🥜your new favourite snack right now! 🍫🥜
—
**An Easy Way to Make Chocolate Peanut Butter Bars in Just 5 Minutes**
What You Need:
* 1.5 cups of graham cracker crumbs 1.5 cups of chocolate chips 1/4 cup of peanut butter (for topping) 1/2 cup of unsalted butter, melted 2 cups of powdered sugar
**Here is the deal:**
Step 1: Blend together 1 cup of peanut butter and melted butter.
Second, combine the powdered sugar and graham cracker crumbs by stirring them together.
Layer an 8-by-8 pan and press the mixture into it.
4. Bring 1/4 cup of peanut butter and chocolate chips to a boil. Apply to the bottom.
5. Allow to rest for five to ten minutes. After slicing, enjoy!
Asking for advice? Which types do you prefer? Leave a comment, and let’s collaborate to improve dessert!