Meta Description: Discover how to make the creamiest, easiest chocolate peanut butter fudge using the classic marshmallow fluff method. This is the best fudge recipe for a rich, nostalgic, and unbelievably simple treat.
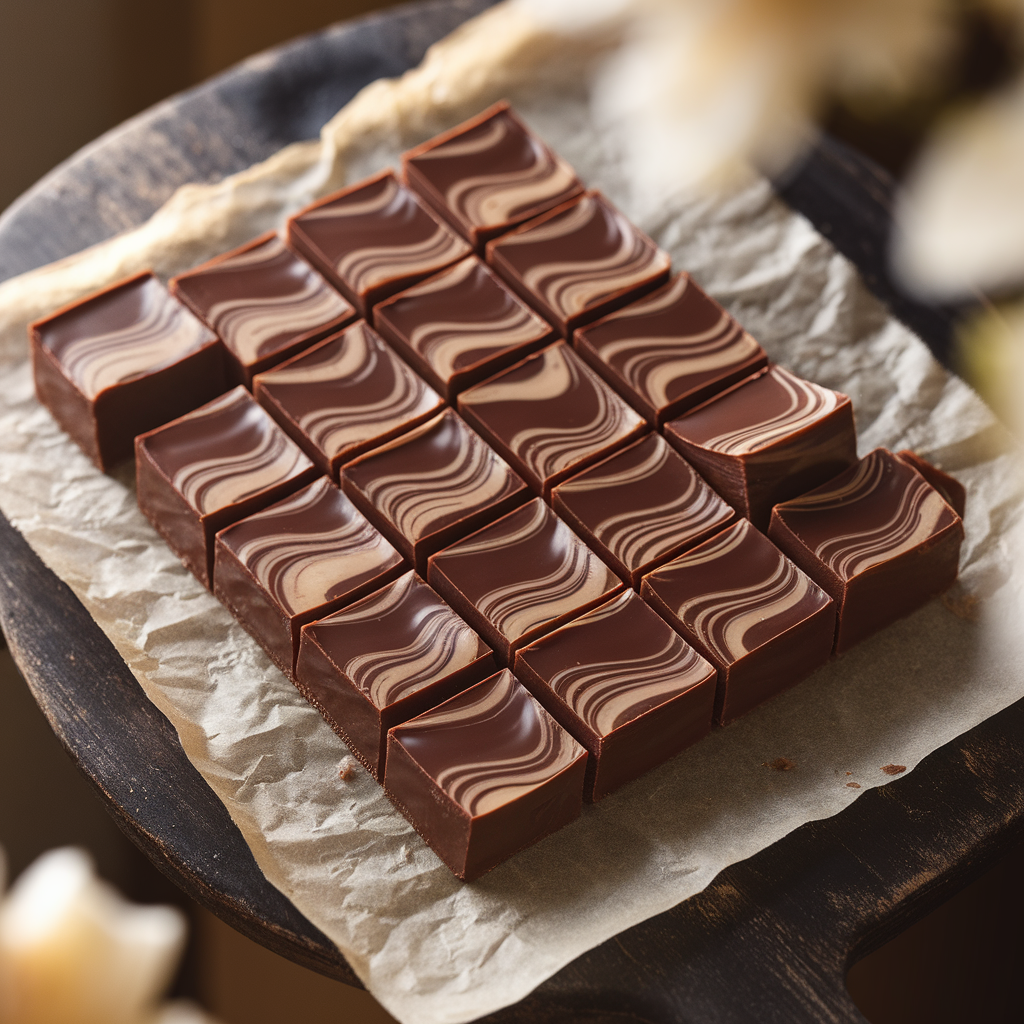
The Ultimate No-Fail Marshmallow Fluff Chocolate Peanut Butter Fudge Recipe
If you’re anything like me, the flavor combination of chocolate and peanut butter brings you right back to your childhood. But maybe not to the actual candy bars. For me, it was always the holiday fudge—that unbelievably rich, melt-in-your-mouth square of pure indulgence.
I’ll be honest: for years, I thought making fudge was a mythical, tricky kitchen adventure involving candy thermometers, precise temperatures, and lots of praying. I’d watch my grandma fuss over the stove, muttering about ‘soft ball stages’ and humidity. It felt like a chemistry experiment, not a cozy baking project.
Then, I discovered the secret weapon: marshmallow fluff.
This method completely changed the game. It uses the magic of marshmallow cream to stabilize the fudge, resulting in a perfectly creamy, velvety texture every single time—no candy thermometer required! It’s what I now affectionately call my “Chaos-Proof Fudge” recipe. Seriously, if you can boil water, you can master this.
This article will guide you through creating the absolute best marshmallow fluff chocolate peanut butter fudge. We’ll cover everything from the simplest way to get that perfect swirl to clever fudge storage tips so you can enjoy your sweet bounty for weeks. Get ready to impress everyone with the easiest, creamiest, and most decadent fudge you’ve ever made. Let’s get cooking! 😋
Why Marshmallow Fluff is the Best Fudge Recipe Secret
Before we dive into the recipe, let’s talk a little science—but keep it fun, not academic! When you make traditional fudge, you’re trying to achieve a very precise crystallization of sugar. Too hot, and it’s grainy; too cold, and it won’t set. It’s a tightrope walk.
🌟 The Fluff Difference: Marshmallow fluff (also known as marshmallow cream) contains gelatin and corn syrup. These ingredients act as a wonderful buffer. They help control the sugar crystals, keeping them small and ensuring the final product is smooth, not gritty. It’s the ultimate insurance policy for any home cook looking to make homemade fudge without the stress.
This simple substitution turns a high-stakes baking project into a fun, low-effort reward. You get all the rich flavor of a traditional chocolate peanut butter fudge with none of the usual fuss. It’s truly a game-changer and the reason this is the only fudge recipe you’ll ever need.
📝 Ingredients for Classic Two-Layer Fudge
To make this incredible chocolate peanut butter fudge that yields about 64 one-inch squares, you’ll be making two separate, but equally simple, mixtures: the chocolate layer and the peanut butter layer.
Chocolate Fudge Layer
- 2 cups (400g) granulated sugar
- ¾ cup (1½ sticks, or 170g) unsalted butter
- ⅔ cup (160ml) evaporated milk (or whole milk)
- 1 bag (12 ounces) semisweet chocolate chips
- 1 jar (7 ounces) marshmallow fluff (marshmallow cream)
- 1 teaspoon vanilla extract
- Pinch of sea salt (optional, but recommended to cut the sweetness)
Peanut Butter Fudge Layer
- 1 cup (250g) creamy peanut butter (Do not use natural, oil-separating peanut butter; classic brands work best!)
- ½ cup (1 stick, or 113g) unsalted butter, melted
- 2 cups (240g) confectioners’ sugar (powdered sugar)
- ½ teaspoon vanilla extract
Prep Time: 15 minutes Cook Time: 10 minutes Chill Time: 2–4 hours (or overnight) Yields: 64 pieces
🔪 Step-by-Step Instructions: Making the Perfect Swirl
This recipe is fast! Once the boiling starts, you’ll need to move quickly, so make sure all your ingredients are measured and ready to go before you even turn on the stove.
1. Prep the Pan
- Line a 9×9-inch baking dish with parchment paper, leaving an overhang on two sides. This is your “sling” later, making it easy to lift the entire slab of fudge out for perfect cutting.
- Lightly grease the parchment paper with butter or cooking spray. Set aside.
2. Make the Chocolate Layer
- In a large, heavy-bottomed saucepan, combine the granulated sugar, unsalted butter, and evaporated milk.
- Bring the mixture to a full, rolling boil over medium heat, stirring constantly to ensure the sugar dissolves. A rolling boil is one that continues even when you stir it.
- Once the mixture reaches a rolling boil, set a timer and let it boil for exactly 5 minutes, continuing to stir constantly. Do not stop stirring, as it can scorch quickly!
- Remove the pan from the heat immediately.
- Quickly stir in the semisweet chocolate chips until they are completely melted and the mixture is smooth and glossy.
- Add the marshmallow fluff (all of it!), vanilla extract, and a pinch of sea salt. Stir vigorously until the mixture is uniform, creamy, and wonderfully smooth. This is your chocolate fudge base.
- Pour about two-thirds of the chocolate fudge mixture into the prepared pan. Use an offset spatula to spread it into an even layer.
3. Prepare the Peanut Butter Layer
- In a separate, medium bowl, combine the creamy peanut butter, melted butter, confectioners’ sugar, and vanilla extract.
- Mix well with a sturdy spatula or wooden spoon until a thick, stiff dough/fudge forms. It will be much thicker than the chocolate layer—that’s exactly right!
4. Swirl and Chill
- Drop the peanut butter fudge by the spoonful over the chocolate layer in the pan. Don’t worry about covering everything perfectly.
- Take the remaining one-third of the chocolate fudge and drizzle it in the gaps and on top of the peanut butter mounds.
- Now for the swirl! Use a butter knife or a skewer to gently run through the layers, creating a beautiful marble or swirl effect. Tip: Don’t overdo it! A few gentle passes are better than aggressive stirring, which will just mix the colors completely.
- Cover the pan loosely and refrigerate for at least 3–4 hours, or ideally, overnight, until the fudge is completely set and firm.
5. Slice and Serve
- Use the parchment paper overhang to lift the entire block of fudge out of the pan and place it on a cutting board.
- Using a large, sharp knife, trim the edges for clean lines (and snack on the trimmings!).
- Cut the fudge into small, even 1-inch squares. Remember how rich this is—a little goes a long way!
- Serve and watch them disappear!
💡 Creative Serving & Pairing Suggestions
This marshmallow fluff chocolate peanut butter fudge is perfect on its own, but why stop there? Elevate your dessert experience with these fun, simple ideas.
Fudge Pairings and Toppings
- The Salty Finish: Before chilling, sprinkle a few flakes of Maldon sea salt or another high-quality flaky salt over the top of the fudge. The salt-sweet contrast is absolutely divine and enhances the chocolate flavor.
- Crush and Crunch: Top the fudge with crushed pretzels or chopped salted peanuts for an irresistible textural contrast. You get that salty crunch against the creamy smooth fudge. My kids love this version, and frankly, so do I.
- Dipping Delight: Serve a small square of fudge alongside a steaming mug of black coffee, a shot of espresso, or a glass of cold milk. The bitterness of the coffee beautifully cuts through the richness of the fudge.
Serving as a Plated Dessert
- Mini Dessert Platter: Arrange small squares of the fudge with fresh raspberries and a few chocolate-dipped strawberries for an elegant, colorful display.
- Fudge Ice Cream Sundae: Crumble a chilled square of chocolate peanut butter fudge over a scoop of vanilla bean or coffee ice cream. Drizzle with a little extra chocolate sauce for true decadence.
- The Holiday Gift: Fudge makes a wonderful, heartfelt homemade holiday gift. Layer the pieces in a decorative tin with parchment paper separating the layers. A little ribbon and a tag, and you’ve got a personal, memorable present.
🔄 Delicious Recipe Variations
Once you’ve mastered the classic marshmallow fluff chocolate peanut butter fudge, you can start experimenting. This base recipe is incredibly versatile!
Layer Swaps and Flavor Twists
- Mint Chocolate Swirl: Substitute the semisweet chocolate chips in the chocolate layer with dark chocolate chips and add 1 teaspoon of peppermint extract along with the vanilla. Skip the peanut butter layer and just swirl in a few drops of green food coloring to the entire batch of mint fudge.
- Nutty Crunch Fudge: Use crunchy peanut butter instead of creamy peanut butter in the peanut butter layer. This adds an amazing, satisfying texture. You can also mix in about half a cup of chopped walnuts or pecans to the chocolate base before pouring it into the pan.
- Caramel Drizzle: Once the fudge has been poured and before it goes into the fridge, use a spoon to drizzle warmed store-bought or homemade caramel sauce over the top. Swirl gently with a skewer. The caramel adds a warm, butterscotch note that pairs perfectly with the chocolate.
🧊 Fudge Storage Tips for Long-Term Enjoyment
The beauty of homemade fudge is its shelf stability. Stored correctly, you can enjoy this treat for weeks!
- Room Temperature: If you plan to eat the fudge within 1–2 weeks, you can store it in an airtight container at a cool, dark room temperature. It keeps best when cut into pieces and separated by layers of parchment paper. This helps prevent sticking.
- Refrigeration: For a firmer, chillier texture and to extend the life to about 3–4 weeks, store the fudge in an airtight container in the refrigerator. Just remember to let it sit at room temperature for about 15 minutes before serving for the best, creamiest texture.
- Freezing (The Ultimate Hack): Fudge freezes beautifully! Cut the fudge into squares, wrap groups of 4–6 pieces tightly in plastic wrap, and then place these wrapped bundles into a freezer-safe, airtight container or zip-top bag. Fudge can be frozen for up to 3 months. Thaw it overnight in the refrigerator, then bring it to room temperature for the best results.
Nutritional Information (Per 1-inch Square, based on 64 servings)
| Component | Amount |
| Calories | 145 kcal |
| Total Fat | 8.5 g |
| Saturated Fat | 4.5 g |
| Carbohydrates | 16 g |
| Dietary Fiber | 0.5 g |
| Total Sugars | 14.5 g |
| Protein | 2.5 g |
| Sodium | 40 mg |
🤔 Frequently Asked Questions About Homemade Fudge
Ready to get started but have a few quick questions? That’s totally normal. Here are the common questions I get about this chocolate peanut butter fudge recipe:
Why did my fudge turn out grainy?
A grainy texture happens when the sugar crystals are too large. In this marshmallow fluff recipe, that usually means one of two things:
- You didn’t stir the sugar mixture enough at the start to fully dissolve the sugar before it came to a boil.
- You didn’t boil it long enough. Make sure to hit that full, rolling boil and let it cook for the whole five minutes. The rapid boil ensures the sugar is fully incorporated into the mixture.
Can I use a natural peanut butter?
I strongly advise against it for this recipe! Natural peanut butter (the kind that separates) has too much oil and not enough stabilizers. This can cause the peanut butter layer to become greasy and runny, ruining the texture of your beautiful two-layer fudge. Stick with the classic, no-stir varieties like Jif or Skippy for the best, most reliable results.
Is this a good recipe for holiday gifts?
Yes, this is a fantastic homemade holiday gift! Because of the way the marshmallow fluff stabilizes the recipe, it holds up very well at room temperature and ships better than many other homemade baked goods. Just be sure to wrap the pieces tightly, and include a cute note with the fudge storage tips!
What if I don’t have a 9×9-inch pan?
You can use a 9×13-inch pan, but your fudge will be much thinner. If you want a tall, thick piece of chocolate peanut butter fudge, you may need to double the recipe to fill a 9×13-inch pan properly. If you use an 8×8-inch pan, your fudge will be extra-thick, but you will need to increase the chill time to ensure it sets all the way through.
🎉 Conclusion: Your New Go-To Dessert
There you have it—a no-fail, perfectly swirled, incredibly creamy marshmallow fluff chocolate peanut butter fudge recipe. This isn’t just a dessert; it’s a ticket back to simpler times, wrapped up in a glorious, decadent square.
We conquered the candy thermometer fear with the magic of marshmallow cream, ensuring your fudge is smooth, rich, and utterly irresistible. From the crucial 5-minute boil to the gentle swirling technique, you now have all the confidence and knowledge you need to make the best fudge recipe your family and friends have ever tasted. The classic combination of chocolate and peanut butter is unbeatable, and in this form, it’s absolutely perfection.
Now, it’s your turn! Gather your ingredients, crank up the radio, and get that rolling boil started. You are just a few simple steps away from the sweetest reward. Once you’ve created this masterpiece and cut your first piece, please come back and share your experience!
Did you add flaky sea salt? Did you try the caramel drizzle variation? I’d love to hear which version you made and if this is now your go-to fudge recipe! Happy baking!