Most smart TVs leave the factory tuned for a shop floor. Light output sits near its maximum and colours lean towards blue, and a processing stage invents extra frames. To set up a smart TV picture that suits your room, you replace those defaults with settings chosen under your own lighting. It takes about thirty minutes and six steps.
You’ll finish with a picture that holds shadow detail on dark scenes and stays comfortable on bright ones, saved for each source you use. One decision shapes everything: the hour you watch most. Pick it before you begin, because the steps assume that hour and settings that suit an evening room look too dim at noon.
Before you start
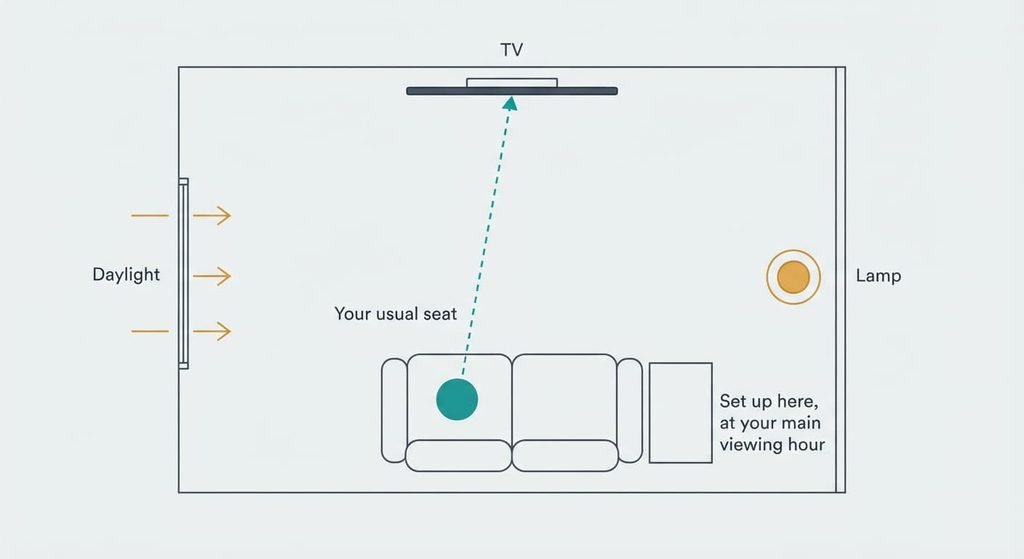
Sit in your usual seat with the room lit as it is at your chosen hour, because every setting here is a judgement made against the light around the screen. A picture tuned in a bright shop or a dark afternoon looks wrong when the real conditions return. Close the curtains or leave them open and switch the lamps on or off exactly as you do when you watch.
Everything after that depends on the light.
Four other things need to be ready. A panel’s brightness and colour drift as it warms, so the TV should have been on for about twenty minutes. You need a film or series you know well. It should contain one dark scene and one bright outdoor scene. Switch off energy-saving options for the session, because they can change brightness behind your back. A phone for photographing each settings screen is worth having too. Before you set up a smart TV picture, remember that makers rename controls constantly, so look for each description rather than the label. I can’t see your menus, and a label that matches here may differ on your set.
The procedure to set up a smart TV picture, step by step
1. Switch off the shop-style defaults. Find the setting that says whether the TV is used at home or in a shop. Turn the automatic light-sensing feature off too, because it changes brightness while you judge. Shop modes push light output and colour to look striking under strong lighting, and some return after a power cut. You’ll know it worked when the picture looks calmer and dimmer than before.
2. Choose a base preset. Pick the preset whose description mentions accuracy or film, and avoid those named for vivid pictures. Presets differ mostly in colour temperature and processing. Video is mastered to a white of 6500 K, which the warmest colour-temperature option usually approaches. You’ll know it worked when a white caption looks neutral rather than blue.
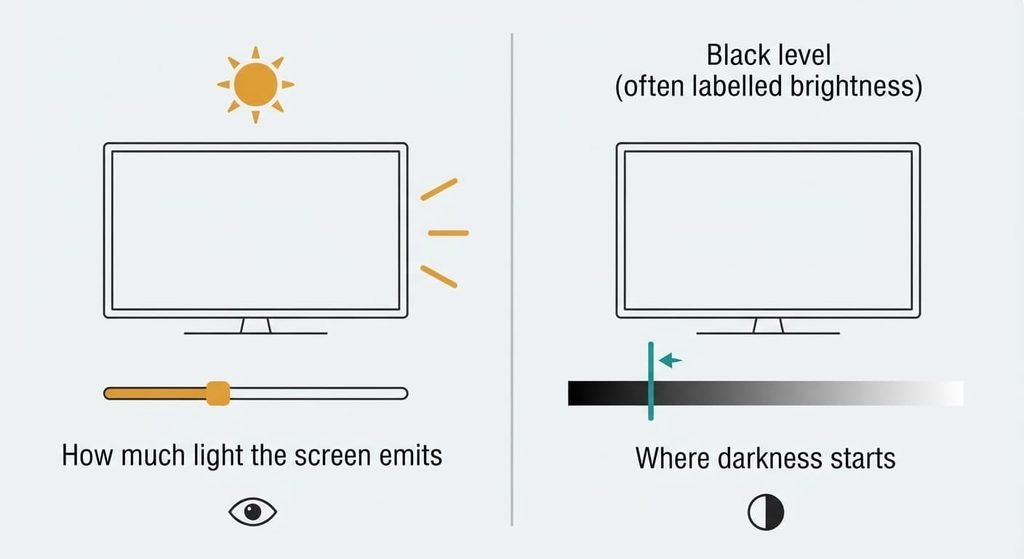
3. Set the light output for the room. Find the control that sets how much light the screen emits. It sits apart from the control labelled brightness, which in most menus sets the black level. Lower it until a white page is comfortable at your seat, then raise it a step if your chosen hour has daylight. You’ll know it worked when a bright scene still feels comfortable after ten minutes.
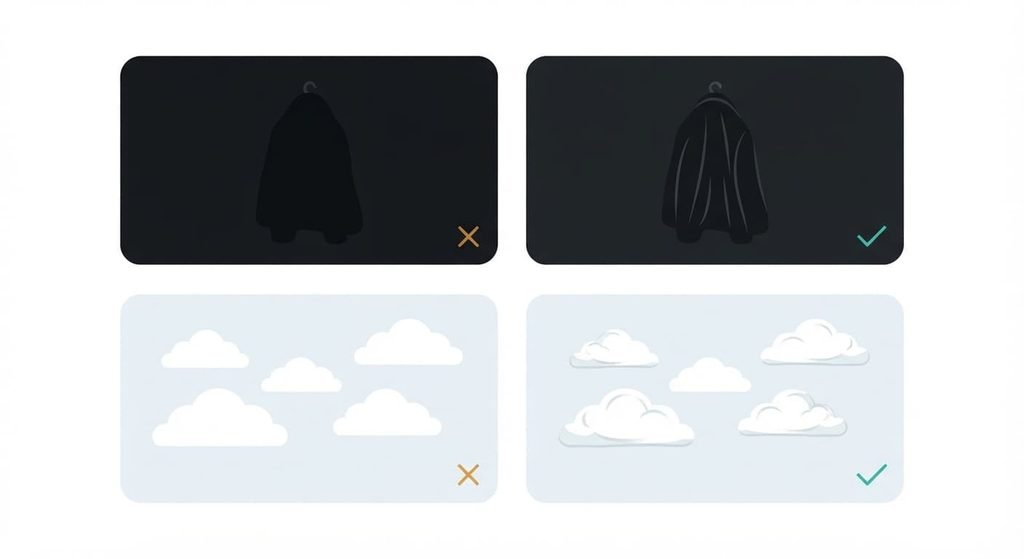
4. Set the black and white levels. Play your dark scene and raise the black-level control until shadow detail appears. Then lower it until black looks black. Play your bright scene and lower the contrast control until cloud texture returns. Crushed shadows and clipped highlights are lost information that no later setting restores. You’ll know it worked when jacket folds and cloud texture are both visible.
5. Turn the processing down. Motion smoothing inserts invented frames between real ones, and edge sharpening adds a bright outline to edges. Turn down noise reduction and any feature that rewrites contrast scene by scene. I’d switch motion smoothing off for films and drama even though many viewers like it, because film is shot at 24 frames a second and extra frames change how actors move. You’ll know it worked when small text has no halo and a camera pan shows slight judder.
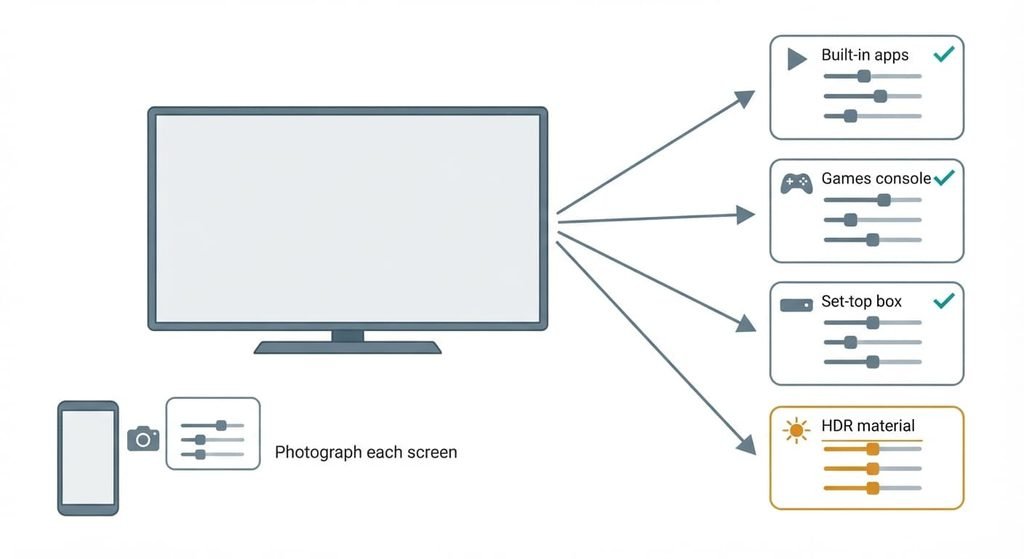
6. Save it for every source. Settings are normally stored per input, and often separately for HDR material, which is video with a wider brightness range. Repeat steps 3 to 5 on each input that matters and photograph each settings screen. A software update or a factory reset can return the defaults and erase your changes, so the photographs are your backup. You’ll know it worked when switching inputs gives a consistent picture.
Check the smart TV picture is set up properly
The test covers the finished picture and leaves the steps alone. Watch one dark scene and one bright scene you know well from your usual seat at your chosen hour. In a pass, shadows show detail without looking grey and whites hold texture. Skin looks natural rather than orange or grey.
A partial pass is common: the evening picture is right and the same picture looks dim at midday. That is the expected result of calibrating for one hour. It means you need a second saved preset for the other hour rather than a compromise between the two. Run the same two scenes on a second input before you call it finished. If the picture differs there, step 6 is incomplete. The room must also match step 1: a lamp that is on now but was off during setup makes the test invalid.
If a step did not work
If you set up a smart TV picture and the changes vanish after a restart, a feature such as energy saving is overriding them. The TV may also have returned to shop mode. Switch the feature off and repeat step 1. Then restart and check again.
If the picture feels too dim after step 3, wait ten minutes before judging. Your eyes adapt, and a picture that looked dazzling in shop mode makes the correct one seem flat at first. If it’s still dim at your chosen hour, raise the light output by one step and look again.
If one input looks different, settings are stored per input. Repeat steps 3 to 5 on that input, and check whether the TV keeps a separate set for HDR material.
If the picture shifts when a game starts, the TV has switched to a low-delay mode with settings of its own. Adjust that mode separately.
The step not worth taking
Copying another reviewer’s published settings is the shortcut most guides offer. Published numbers describe one reviewer’s panel in one room, and two panels of the same model differ from unit to unit. Reviewers also work in a lit or dark reference room, while yours has its own lamp and window and wall colour, all of which change how bright a picture looks. A software update can also change what a number does. I’d defend a stricter view than the usual advice: treat borrowed numbers as a hint about direction after steps 1 and 2, and trust your own dark-scene test over any figure. Use their figures to check you’ve gone the right way, never to replace the test. When you set up a smart TV picture by eye under real lighting, you capture the one variable no review can see, which is your room.
A number from someone else’s room is a guess about yours.
The finished state is a picture saved for each source and tuned under your own lighting at your main viewing hour. Processing is turned down and no shadow or highlight detail is lost. The one check that confirms it is the dark-scene and bright-scene test from your usual seat. If the evening picture looks dim at noon, save a second preset for that hour. Photographs of your settings screens turn any later reset or update into a repair of a few minutes.
Questions readers keep asking
How long does it take to set up a smart TV picture?
About thirty minutes for the first source. Twenty of those are the TV warming up and your eyes adjusting, while the steps themselves take far less. Each further input takes a few minutes more, because only steps three to five repeat.
Will changing picture settings erase anything on my smart TV?
Changing picture settings erases only the previous values, so nothing else on the TV is affected. Your apps and accounts stay untouched. A reset of the picture settings returns the defaults, so photograph each settings screen first. Only a factory reset also removes accounts and installed apps.
Do I need different picture settings for day and night?
Often yes. A dim evening room needs less light output than a room with daylight, so one setting is a compromise. Many sets let you save a second preset. Calibrate one for your main hour, then raise the light output step by step for the other hour and save that as its own preset.