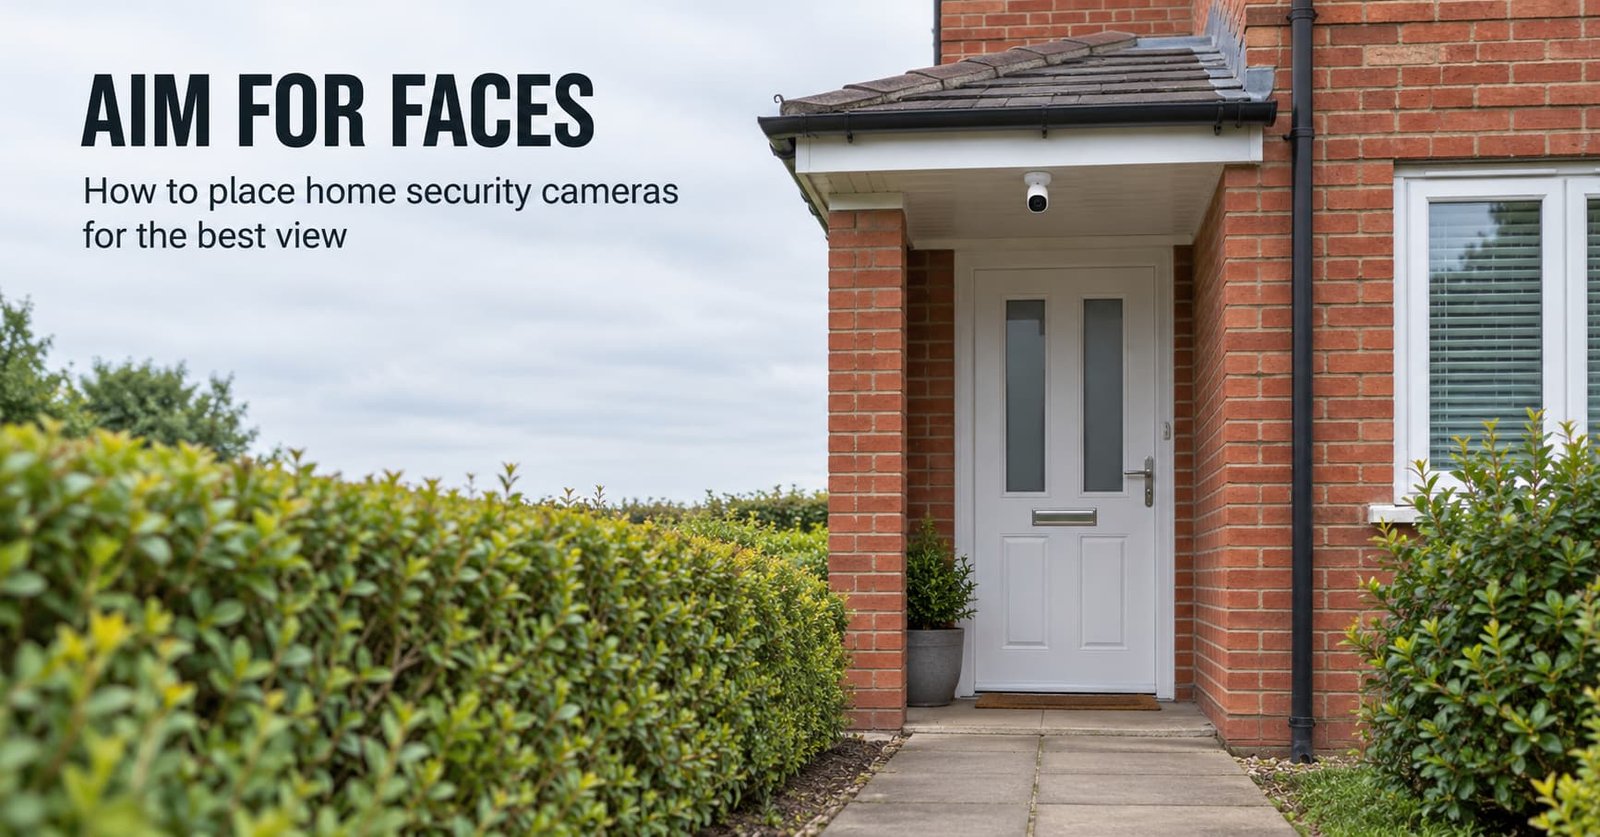
A camera screwed under the porch roof sees every visitor from above, and a visitor’s face is the part it was bought to catch. To place home security cameras so faces survive, measure the approach first. Then pick a height by two limits and prove each spot with a test walk. You finish with two positions that each give a usable view, in about three hours over a weekend.
A single choice sets the scope. This guide watches the approach and the doorstep. The street and the garden belong to another guide. Figures are worked examples for a UK house with a 6 m path and a step 0.8 m from the door, seen through a 100° wide lens at 16:9.
What to have ready before you begin
You need a tape measure, masking tape for ground marks, a helper to walk the route and a phone with the camera’s live view. Frame only your own land. A camera that records past your boundary, such as a neighbour’s window or the pavement, can bring data-protection duties in the UK, so read the regulator’s current guidance at the end.
The prerequisite that sinks a good angle is rarely mentioned: the signal strength at each spot, checked before you drill. A camera on a weak link saves clips that stutter at the moment someone reaches the door. Every later step to place home security cameras well rests on that link holding. Stand at the spot with the phone and load the live view for two minutes. Radio at 2.4 GHz carries through walls farther than 5 GHz does, so a camera on the older band survives a thicker wall. Note where the power lead will run too, since a short run keeps the angle you choose.
The best angle is useless on a weak link.
If the view freezes at the spot, stop here. Fix the signal first, since every later step assumes clips that arrive whole.
The procedure to place home security cameras, step by step
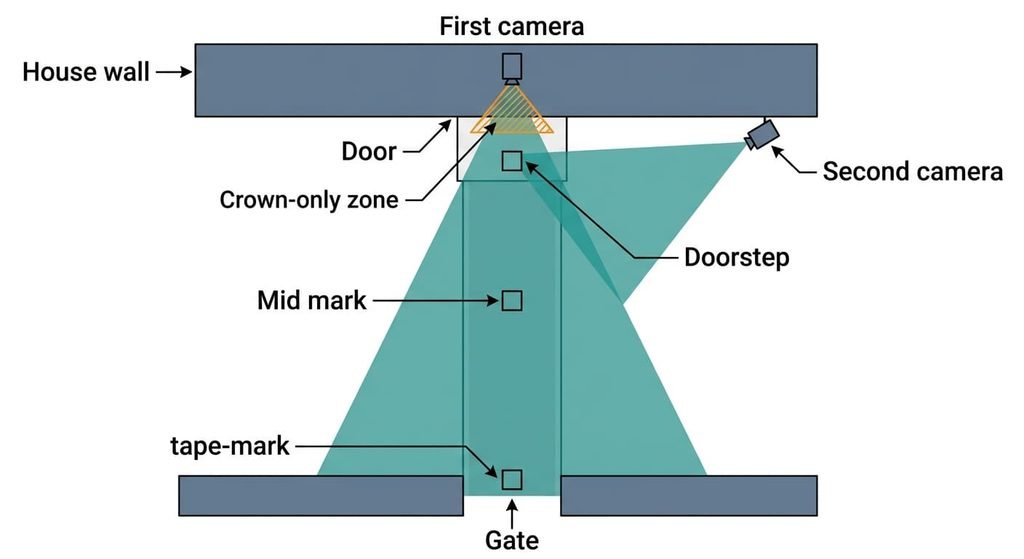
1. Walk the approach and mark three points on the ground with tape: the gate, a spot 4 m from the door, and the doorstep where a visitor stands to ring. Measure each distance to the wall where a camera could go. The marks turn a guess into numbers. Pass mark: three distances are written down. The example reads 6 m at the gate and 0.8 m at the step, with the mid mark at 4 m.
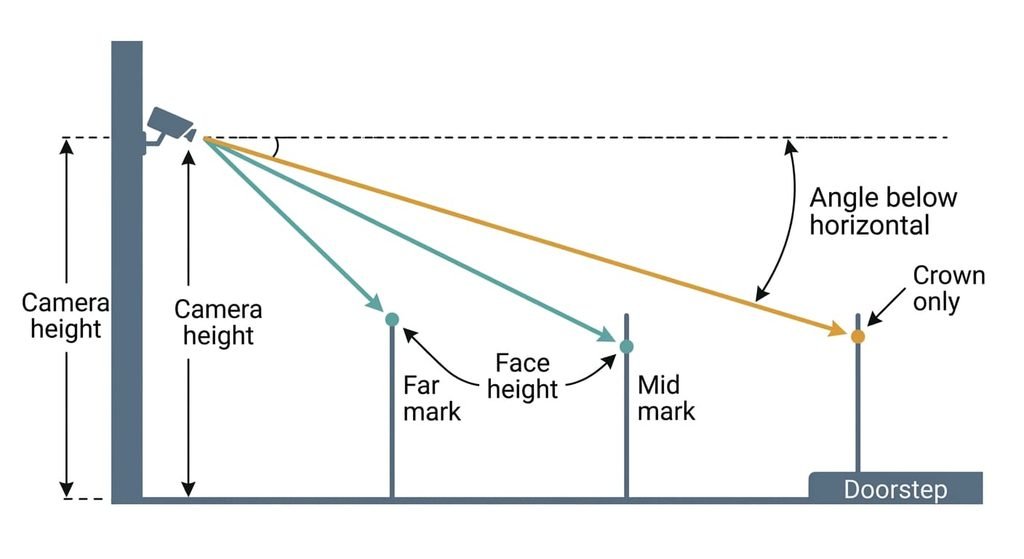
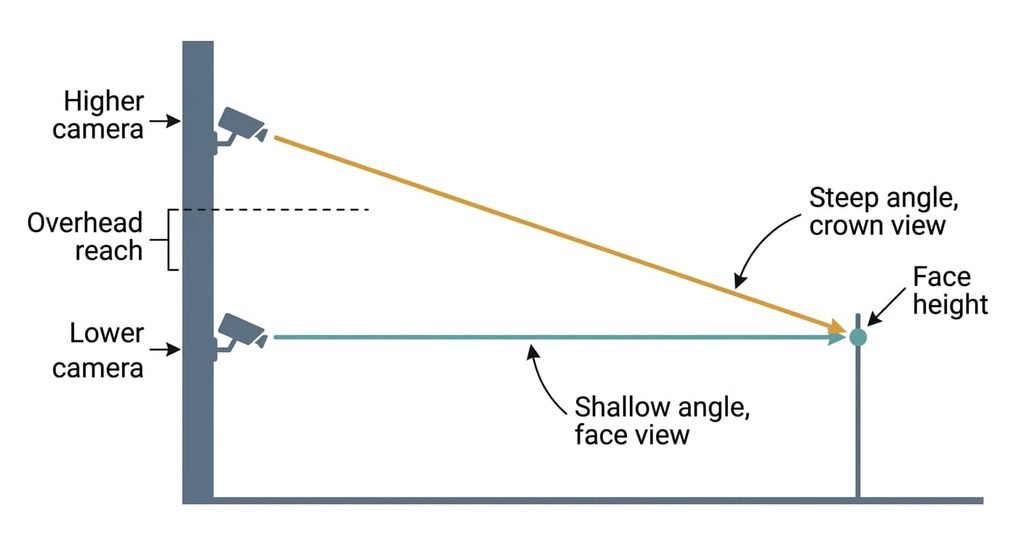
2. Set the mounting height from two limits. An adult’s standing overhead reach is about 2.2 m, so mount at 2.5 m or more. But the higher you go, the steeper the view of a face at close range. The angle below horizontal is the arctangent of (camera height minus 1.6 m) over the distance. Pass mark: each mark has an angle. At 2.7 m the example gives 10°, 15° and 54°.
3. Find where faces are lost. A face reads well while the camera looks down no more than about 30°, which is a working limit and not a standard. At 2.7 m that fails inside 1.9 m of the camera, so the step at 54° shows a crown. Slide a second camera sideways along the wall until the face at the step is 1.9 m away. For a visitor 0.8 m out, that’s 1.7 m along the wall. Pass mark: both spots have angles under 30°.
4. Fit each camera on a temporary mount and set its tilt. The vertical view is roughly two thirds of the wide angle, so about 68° here, and the lower edge sits at tilt plus half of that. At 15° of tilt, the feet of anyone standing 2.4 m away just reach the bottom of the frame. Pass mark: your helper’s shoes touch the lower edge at the nearest mark.
5. Walk the route again at midday and at dusk, looking at the door each time. A low sun or a porch light can wash out a face. Only a test shows it. Pause the live view at the 4 m mark. Pass mark: a neighbour who never saw the walk can name the walker.
6. Fix each camera permanently. Drill into a mortar joint and not a brick face, because a mortar hole repairs with filler and a brick hole stays visible for good. Lock the bracket in two stages, since a ball joint shifts as it tightens. Pass mark: the walker’s shoes still touch the lower edge afterwards.
Check that your home security cameras really see faces
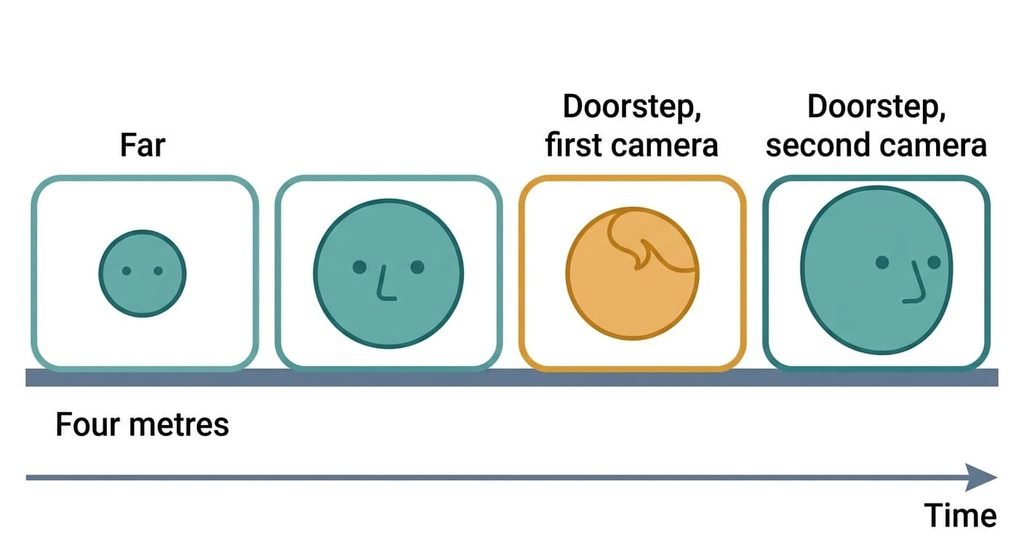
The test is to walk the approach as a courier would, eyes on the door, then review the saved clip the next morning. The live view flatters, because a saved clip uses different compression and starts when the trigger fires.
A pass shows a face you can identify from a paused frame at 4 m and a usable profile at the doorstep. It also shows the clip beginning before the walker passes the 6 m mark. A partial pass shows the face at 4 m and only a hat at the step, which is the expected result from above. If the clip starts with the visitor already at the door, the trigger zone is too short. If only the back of a head appears, the camera faces the wrong way along the path. Return to step 3.
If a step did not work
A clip that begins when the visitor is already at the door is the commonest stall. The trigger zone covers only the near ground, or the pre-roll is off. Widen the zone to the gate and switch the pre-roll on, but expect passing pedestrians to bring some alerts back.
A view that drifts after the bracket locks comes next. The joint rotated as it closed. Loosen it, set the tilt again with your helper at the nearest mark, and lock it in two stages.
A saved clip that stutters or drops frames comes last. That points to the link and not the lens. If you still can’t place home security cameras where the signal holds, move the router closer. Failing that, pick another spot on the same wall. A second spot costs a new set of marks and angles, so redo steps 1 to 3 for it.
The step not worth taking
A common tip is mounting the camera as high as a ladder reaches, and I’d skip it when you place home security cameras for faces. At 5 m the angle to a face is 40° at 4 m and passes 30° only beyond 5.9 m. You’d record roofs and crowns, and the face you wanted would shrink with the distance.
Height buys reach protection and costs faces.
The 2.5 m rule from step 2 already puts the lens out of casual reach. A determined person can still get to it, and a camera that sees faces beats one that sees a crown from a safer spot. The cost is practical too: a fixing at 5 m needs a ladder for every later adjustment, so the tilt you set on day one stays wrong for years. Whether the extra height helps depends on your walls, since a sheer gable may leave no other option. Mount at 2.5 to 3 m and accept the trade.
You finish with two positions: one on the approach and one at the doorstep. Each has an angle under 30° at the marks that matter. The courier test on the saved clip is the single test that proves it. Run it before you trust the cameras with a delivery or a visitor. Run it again after any storm or bracket change that could move the view. A clip of only crowns sends you back to step 2 to lower the camera.
Questions readers keep asking
How long does it take to place home security cameras properly?
About three hours, spread across a weekend. Measuring and the angle sums take under an hour. The temporary mount and two test walks take another hour or so, and the permanent fixing takes the rest. Do the dusk walk on a different evening if the light changes quickly.
Will drilling for a camera damage the wall?
Every hole is permanent, but a mortar joint repairs with filler and a brick face does not. Aim for the joint, use a bit matched to the wall, and keep the cable route short. Your temporary mount from step 4 shows the angle first, so you drill once.
Where should a camera go for a back door or side gate?
Use the same method. The gate or door becomes the end of the walk. Mark the distances, choose a height of 2.5 m or more, and keep the angle under 30° where a face turns toward the lens. A side gate often needs only one camera, because the approach is a narrow path.